 Quick Answer: A professional fiber optic installation typically takes 2–5 days for a standard office in Southern California. While on-site work happens quickly, nearly 40% of the timeline is spent on planning, engineering, and compliance to ensure a seamless, low-disruption upgrade.For business owners in Anaheim and across Orange County, downtime is a four-letter word. Many companies delay upgrading to fiber optics—not because of cost—but because they fear disruption to daily operations.
The reality is that a properly executed fiber optic installation is more like a surgical procedure than a construction project. It is fast, precise, and carefully planned to happen behind the scenes with minimal impact on your business.
Understanding each phase of the installation process helps remove uncertainty and ensures you can move forward with confidence.
Pre-Installation: The Engineering Foundation
Before any cable is installed, a detailed engineering phase sets the foundation for a successful deployment.
This begins with a site survey, where technicians identify the ISP demarcation point—also known as the Minimum Point of Entry (MPOE). This is where your external service provider connects to your internal network.
Next comes a pathway audit. This involves evaluating whether your building can support fiber through existing conduits or whether new infrastructure—such as J-hooks or innerduct—must be installed.
Compliance is critical, especially in Anaheim and throughout Southern California. Installations must follow National Electrical Code (NEC) standards, including the use of plenum-rated or non-plenum cabling depending on airflow spaces.
During the design phase, Alphacomm maps out the network layout, including:
- Main Distribution Frame (MDF) locations
- Intermediate Distribution Frame (IDF) connections
- Optimal cable routing to minimize distance and latency
This preparation ensures the installation is efficient, scalable, and built to last.
The Rough-In Phase: Physical Deployment
Once planning is complete, the physical installation begins—often referred to as the “rough-in” phase.
Fiber optic cable is extremely sensitive and must be handled with precision. Unlike copper, it cannot be pulled aggressively without risking damage to the glass core.
Technicians use specialized tools and techniques, including:
- Tension monitoring to avoid overstressing the cable
- Pulling lubricants to reduce friction
- Controlled routing through conduits and pathways
This phase includes two key types of cabling:
- Backbone (Vertical): Connecting floors or network closets
- Horizontal: Connecting individual workstations or devices
Southern California buildings present unique challenges. In Anaheim’s Platinum Triangle, modern high-rises may have structured pathways, while older industrial buildings in Fullerton may require custom routing solutions.
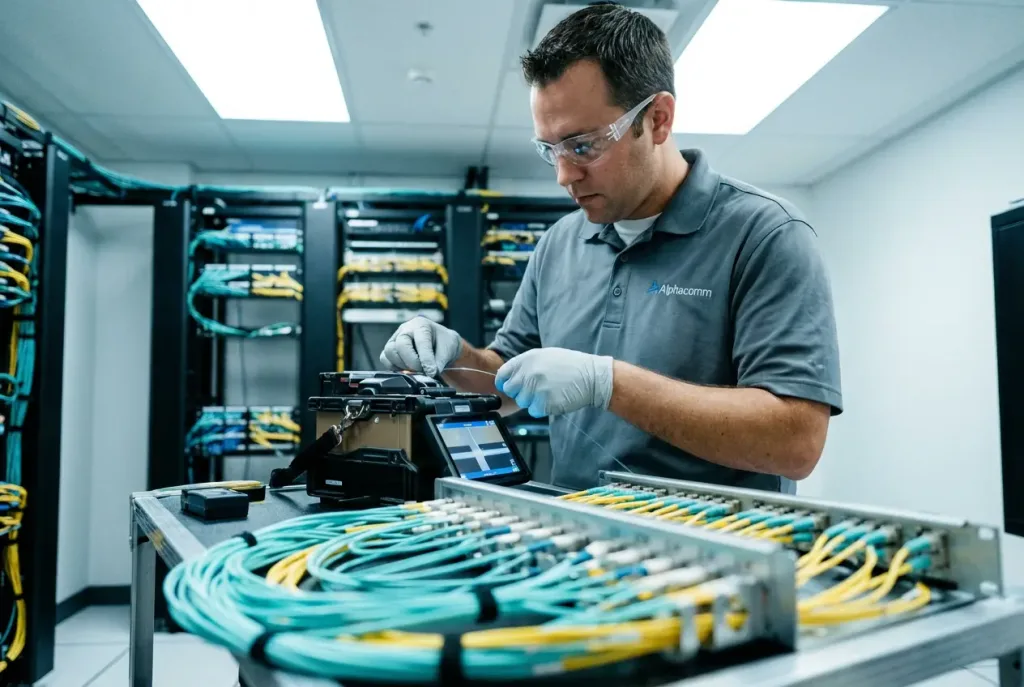
The Science of Connection: Splicing and Termination
Once the cable is in place, the next phase focuses on creating precise, high-performance connections.
Alphacomm uses fusion splicing, which involves welding fiber strands together using an electric arc. This method produces significantly lower signal loss compared to mechanical splicing.
Benefits of fusion splicing include:
- Minimal insertion loss
- Higher long-term reliability
- Stronger physical connections
Fiber connectors also play a critical role. Common types include:
- LC (most common for high-density environments)
- SC (used in legacy systems)
- ST (less common today)
During termination, technicians follow a “clean room” standard. Even microscopic dust particles can disrupt light transmission and cause signal reflection issues, so precision and cleanliness are essential.
Final Phase: OTDR Testing and Certification
Once installation is complete, the network must be tested and verified to ensure performance meets industry standards.
This involves two levels of testing:
- Tier 1 Testing: Light source and power meter validation
- Tier 2 Testing (OTDR): Detailed analysis of the fiber using an Optical Time-Domain Reflectometer
An OTDR test generates an “event map,” which identifies:
- Signal loss at each splice and connector
- Cable faults or irregularities
- Overall network integrity
At project completion, clients receive a full certification report—essentially a “birth certificate” for their network. This documentation is critical for future troubleshooting, upgrades, and warranty protection.
Variables That Can Affect Your Timeline
While most installations fall within a 2–5 day window, several factors can extend the timeline:
- Permitting: Outdoor runs or street crossings in Orange County may require city approvals
- Older Buildings: Hazardous materials such as asbestos can delay work
- After-Hours Scheduling: Many Anaheim businesses opt for nights or weekends to avoid disruption
Alphacomm manages these variables proactively to keep projects on track.
Fiber Installation Timeline Summary
| Phase | Duration | Primary Activity |
|---|---|---|
| Site Audit | 1 Day | Blueprinting, pathway identification, and code compliance |
| Rough-In | 1–2 Days | Physical cable pulling and support structure installation |
| Termination | 1 Day | Fusion splicing and connector assembly |
| Certification | 1 Day | OTDR testing, labeling, and documentation |
Conclusion
A fiber optic installation may take only a few days, but it delivers infrastructure that supports your business for decades. With proper planning and expert execution, the transition can happen with minimal disruption.
Ready to upgrade your network? Visit our Fiber Optics Services page to request a customized quote and site survey.